

The most valuable hour in a renovation or tenant improvement project happens before the bid is submitted. An architect walks the site, documents what is actually there, and decides what is possible — with whatever measuring tape, camera, and clipboard they brought. The quality of that single site visit decides whether the firm’s bid is competitive, whether the project schedule holds, and whether change orders eat into margin after work begins.
An existing conditions survey — the documentation produced from that visit — is the foundation. It is also where most architecture firms lose time and money. Architects routinely spend half a day capturing measurements and photos, then return to the office with handwritten notes and a folder of context-free images. Bidding architects frequently need a second site visit to fill in gaps. The downstream cost is real: slower bids, weaker proposals, surprise change orders after the contract is signed.
This post walks through why traditional existing conditions surveys fall short, how a consumer 360° camera plus CupixVista compresses the workflow, and what an end-to-end pre-bid loop looks like — from site walk to BIM-ready output.

Why existing conditions surveys make or break renovation bids
For renovation and tenant improvement projects, the existing conditions survey is the single deliverable that lets every later decision happen. Design options, scope, schedule, materials takeoff, and the bid price all flow from what the survey captured. If the survey missed something — a recessed beam, a non-standard ceiling height, a buried mechanical run — the gap shows up later as a costed change order or a redesign sprint, eroding margin and the firm’s reputation.
The firms that win these projects on schedule and budget are the ones that get the existing conditions survey right the first time. That means capturing more context, with more detail, in less time, with anyone on the team able to do the capture — not just the senior architect available the Tuesday afternoon the building owner is willing to grant access.
Where traditional bid documentation falls short
Manual, time-bound capture
Before the bid is due, every interested architect typically gets a short window of time to visit the site, take measurements by hand, and shoot images on a phone or DSLR. The documentation process is slow because every step is manual. A team of two architects can easily spend six hours documenting a single-family home, and that’s before they have to organize the output.
Missing or outdated as-built drawings
Many renovation projects come with as-built drawings that are outdated or simply wrong. Walls have moved. Equipment has been added or replaced. Ceiling heights have changed during a prior renovation. Architects can’t fully trust the drawings they’re handed, which means more measurements on site — or worse, design decisions based on assumptions that don’t survive contact with the construction crew.
Fragmented photos and notes with no spatial context
At the end of a site visit, the typical architect comes back with a measurement sheet and a few hundred photos with no metadata about where each shot was taken. Locating a specific measurement or photo later is hard. Coordinating across teammates is harder. There is no centralized, searchable repository of the site, so decisions get made from incomplete views of the space.
Slow path from documentation to BIM
To bid intelligently, architects often produce a floor plan or BIM model. Without software that imports site documentation directly into BIM, teams produce drawings manually, with educated guesswork. The model is slow to build, hard to reproduce, and only as accurate as the underlying capture.
Site disruption during the bidding window
The site is often a working building. Every time an architect needs to return because a measurement was missed or a photograph wasn’t shot, the building owner has to coordinate another visit. Tenants are interrupted. Operations slow down. A firm that needs three site visits to bid loses goodwill before the contract is signed.
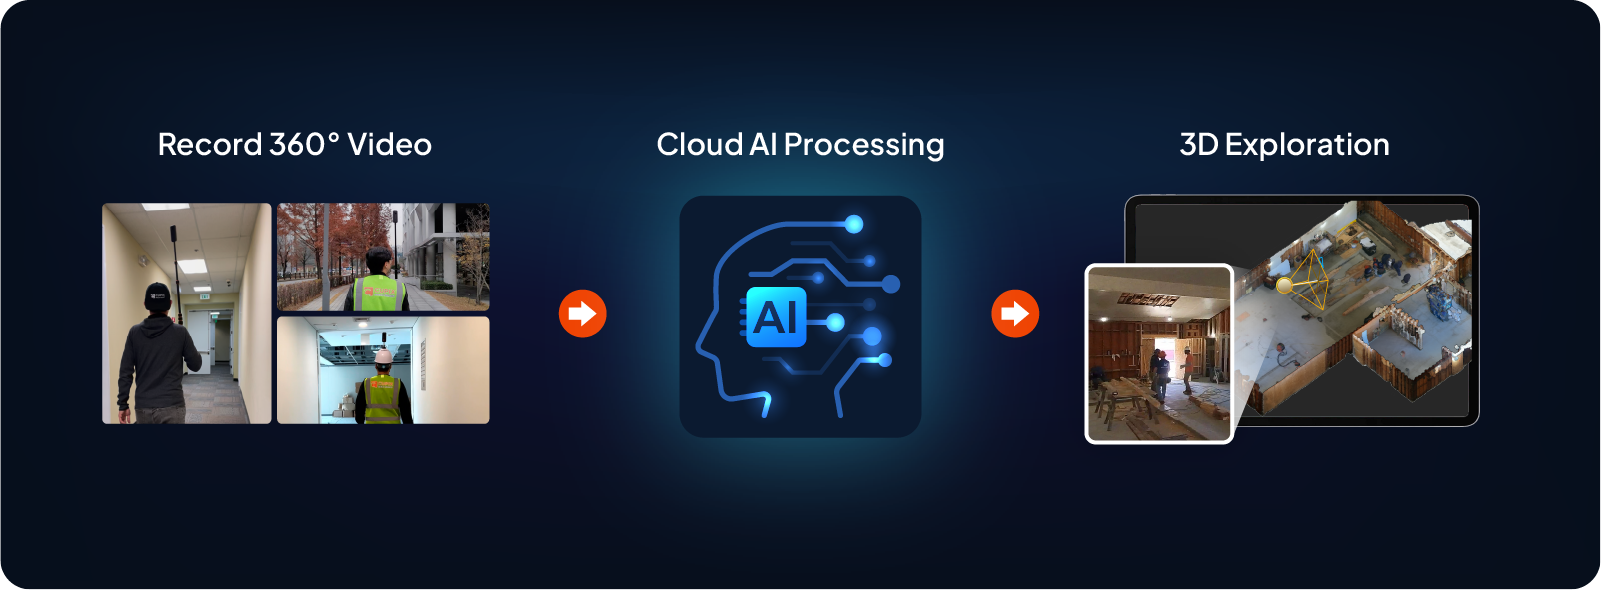
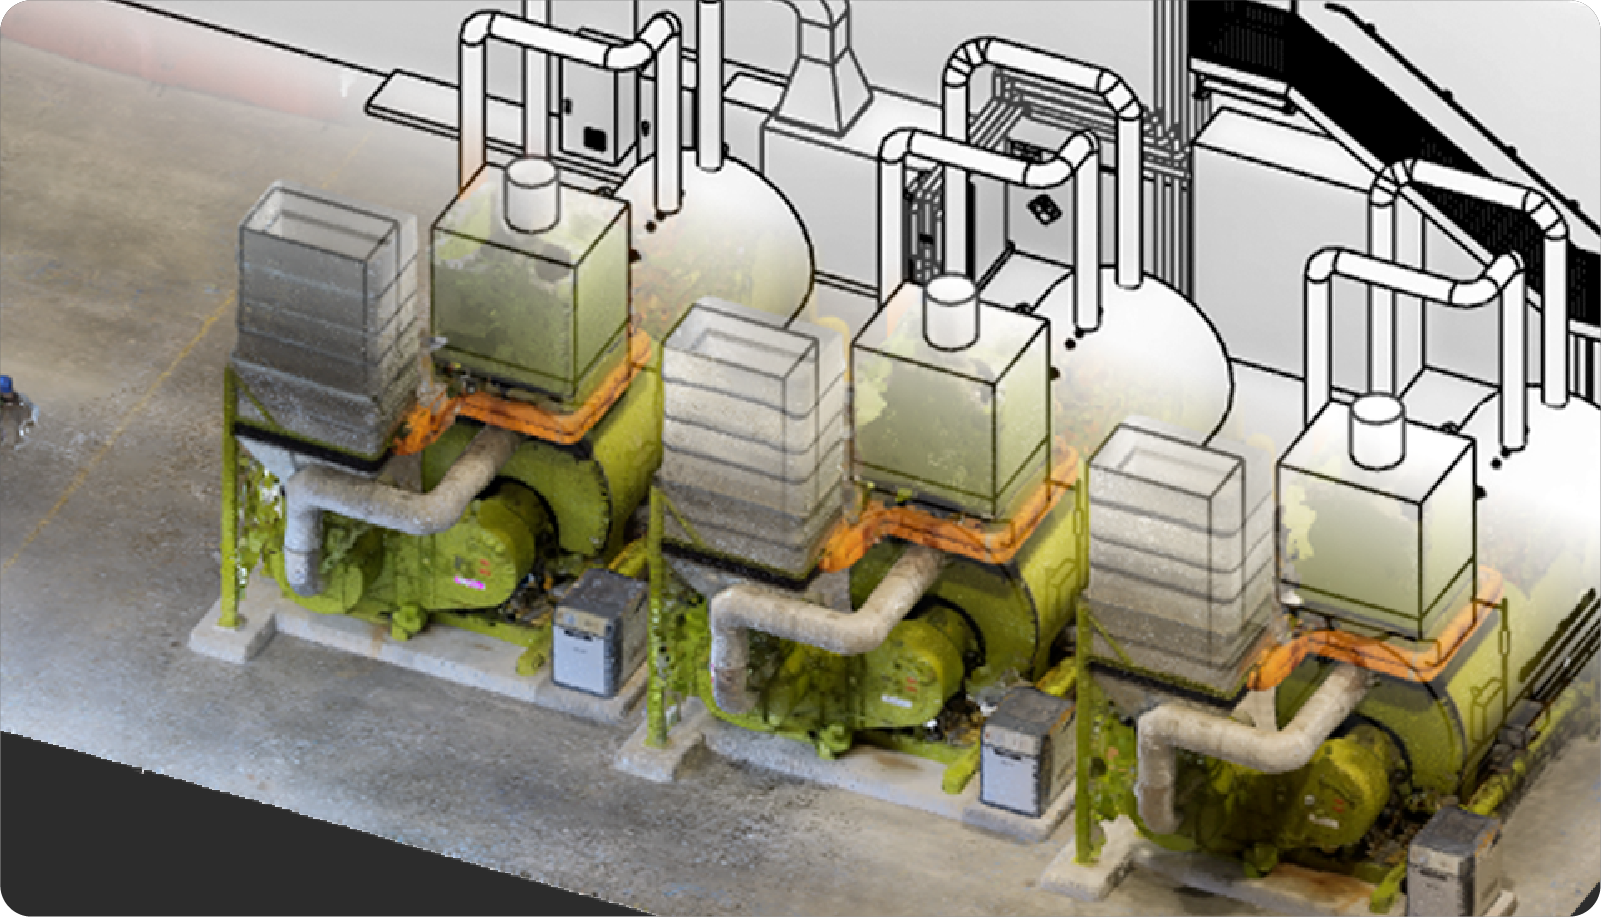
A faster existing conditions workflow with CupixVista
CupixVista replaces manual measurement and unstructured photo capture with a single continuous workflow: a walking 360° video, automatic AI processing, and a shared 3D project the whole team can open.
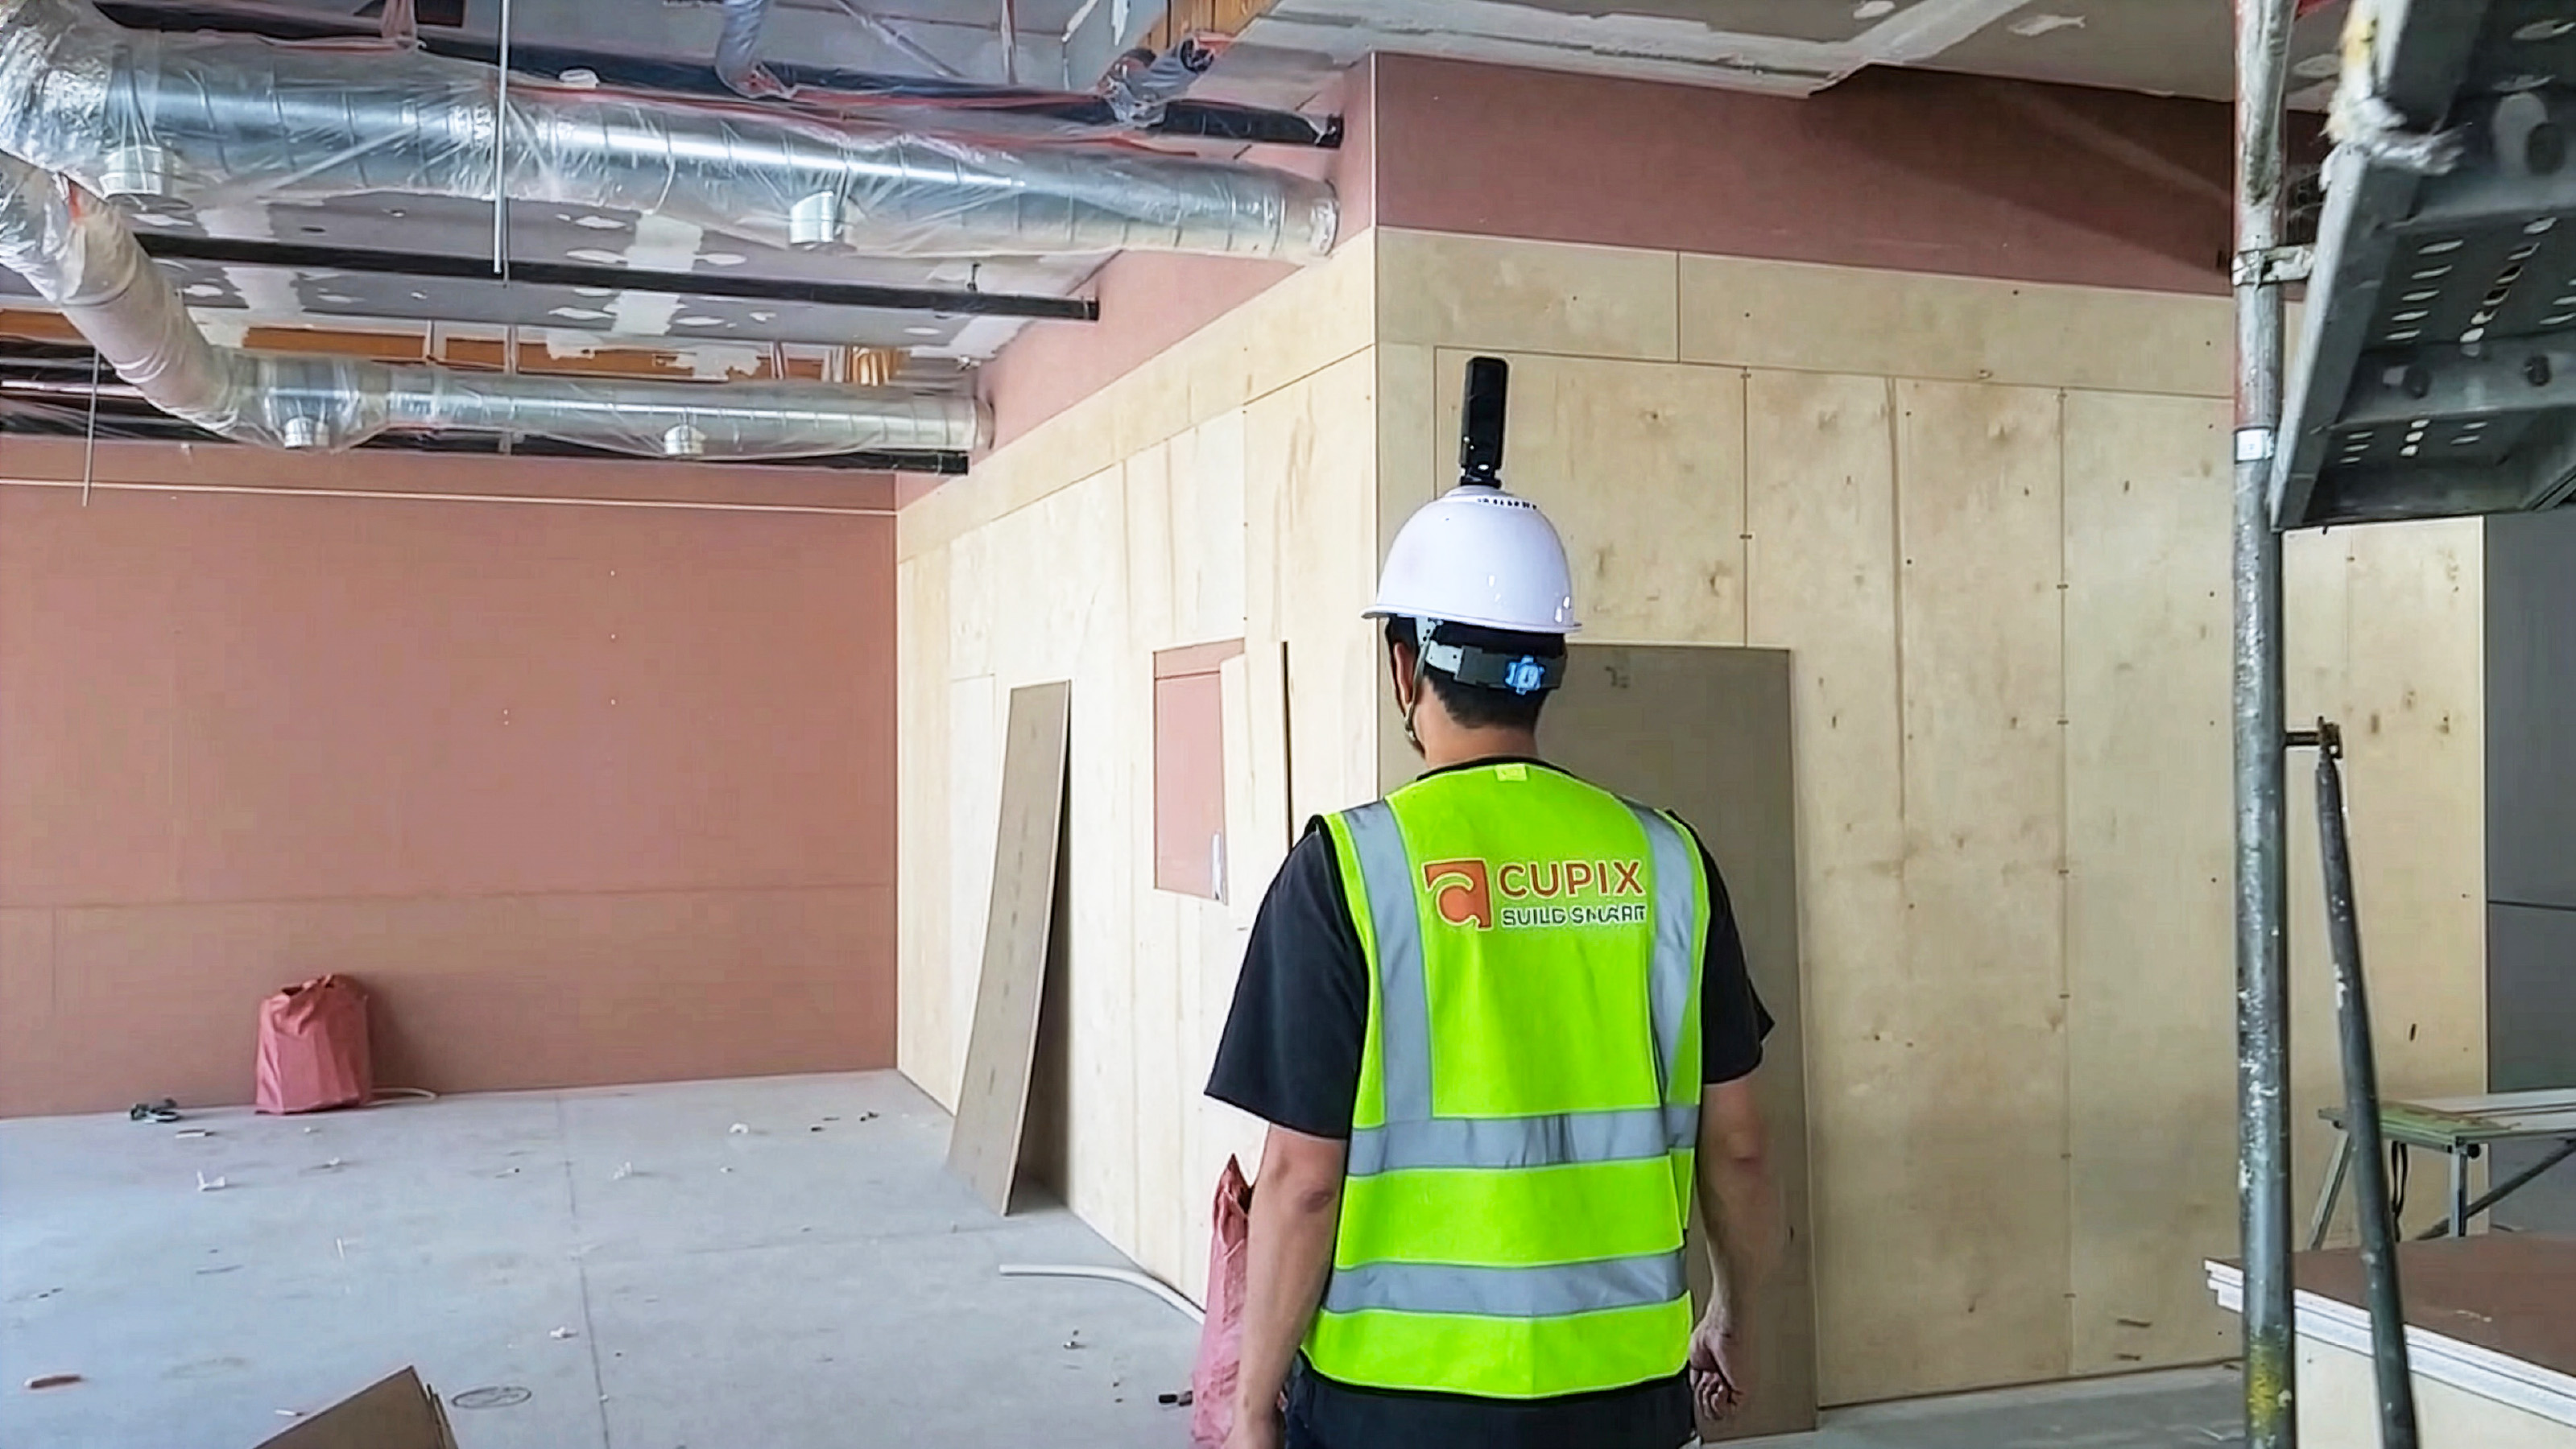
A 20-minute walk replaces a day of manual measurement
One person walks the site with a supported consumer 360° camera. A 20-minute walk covers up to 60,000 sq ft (6,000 m²) — indoor, outdoor, or mixed. Footage uploads through the VistaCapture mobile app; AI processing finishes in two to three hours. The same single-family home that took two architects six hours to document by hand can be captured by one team member in under twenty minutes.
Full site context, captured continuously
Because the camera records 360° in every direction, the architect doesn’t need to decide what to photograph. Everything in line of sight is in the capture: architectural elements, wall colors and alignments, window placement, ceiling features, equipment, finishes, and the rooms that the architect didn’t think to photograph on the original walk. Full site context, captured without the decision overhead.
Geo-tagged detail photos and voice notes with OmniNote
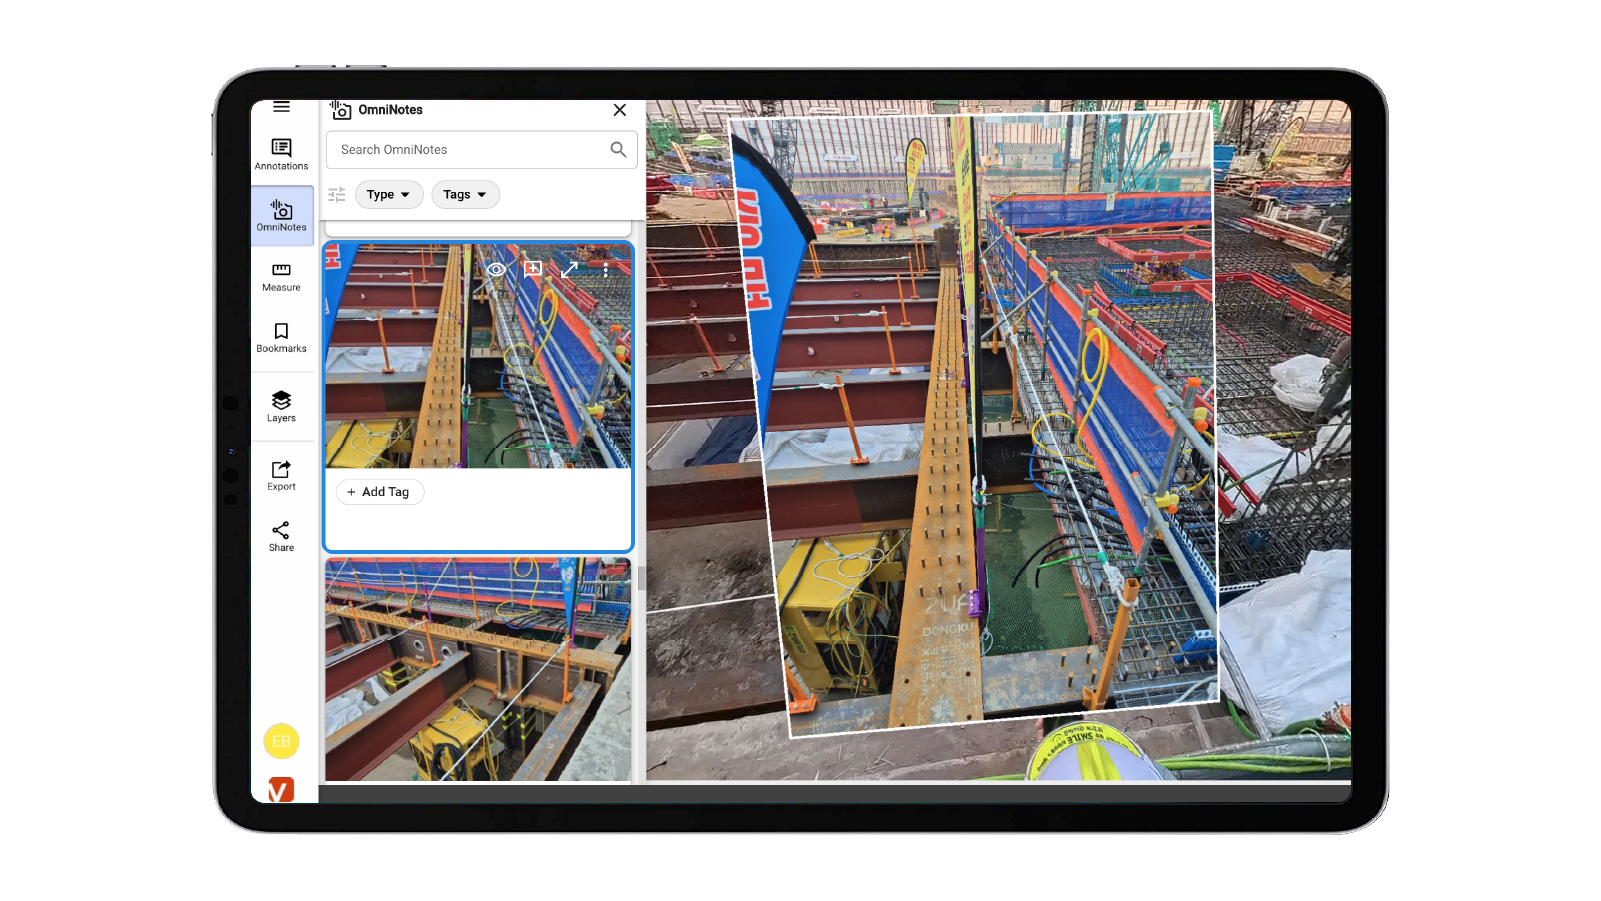
A 360° lens spreads resolution across the full sphere, so it’s not the right tool for tight detail shots of nameplates, fixtures, or markups. OmniNote closes that gap. During the same walk, the architect uses a phone to take high-resolution photos and record voice notes — and CupixVista automatically pins each one to the right point in the 3D model. Voice notes auto-transcribe to searchable text. AI text recognition reads equipment nameplates, safety signs, serial numbers, and handwritten markups so they can be searched later.
Scale accuracy without RTK or ground control
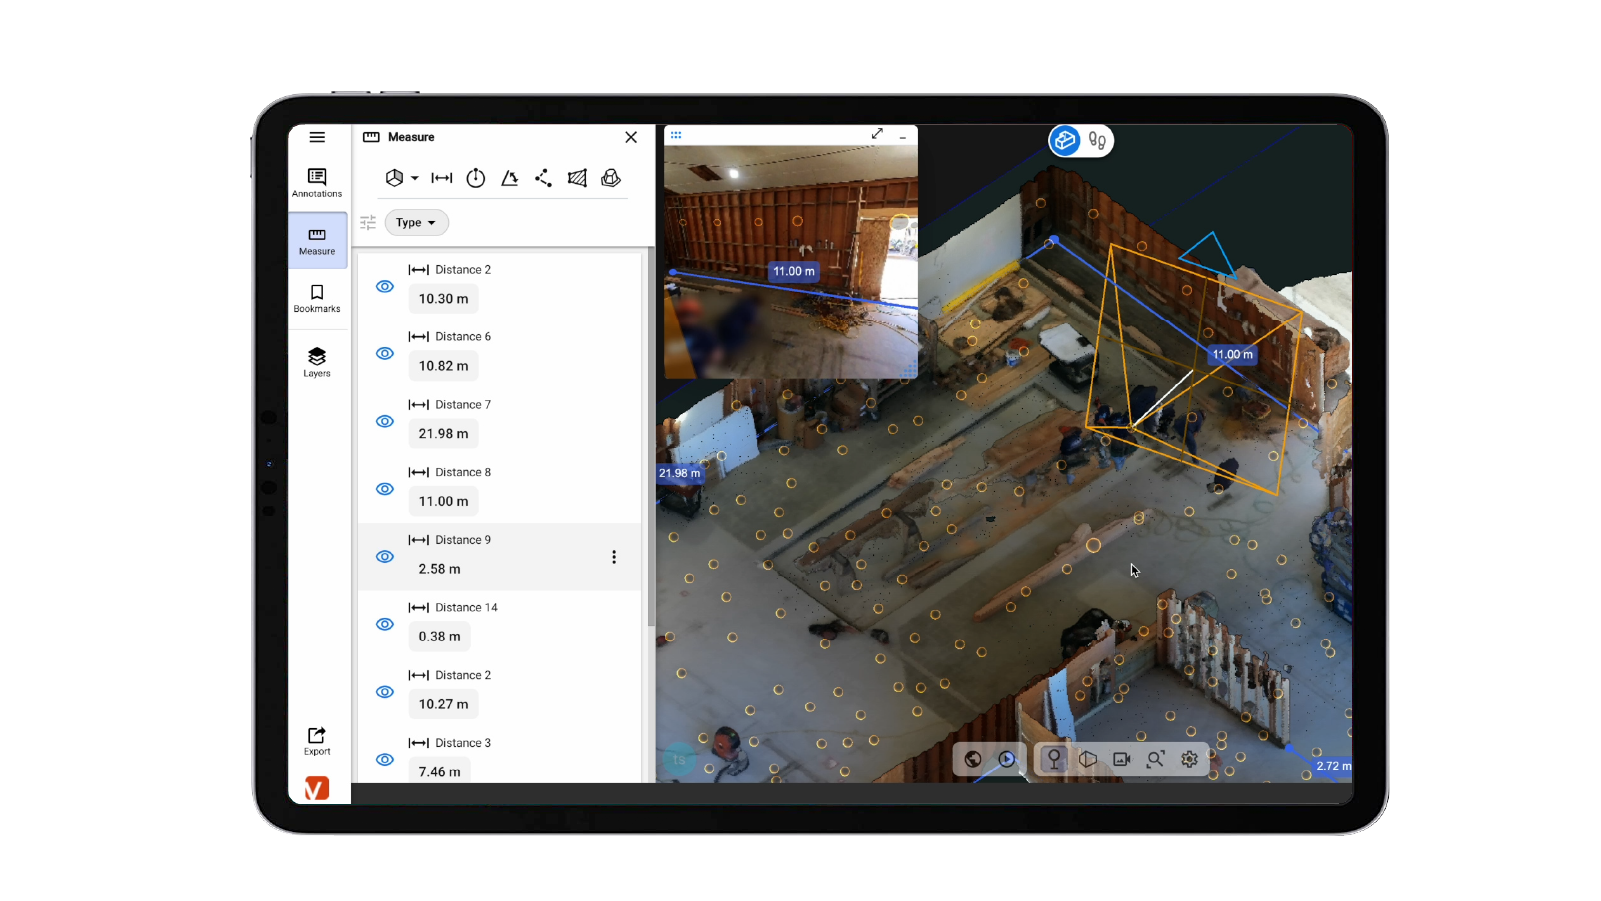
CupixVista fuses video frames, the camera’s IMU (Inertial Measurement Unit) data, and the phone’s GPS to estimate real-world scale. Outdoor segments are auto-detected to filter for reliable GNSS. Dimensions are typically within 1–2% of actual measurements — schematic accuracy that’s right for renovation bid documentation, as-built records, and most scan-to-BIM handoffs, without a $20K instrument or a ground-control workflow.
One-click import into Revit for BIM
A one-click Autodesk Revit plugin imports the CupixVista point cloud directly into Revit, so the same site capture that started the bid conversation becomes the spatial reference for the BIM model. Standard exports (PLY, XYZ, E57) work for any other modeling pipeline. Cupix service partners can deliver finished BIM assets if the firm prefers to outsource the modeling.
Anyone on the team can run the capture
The workflow needs no specialist training. Junior staff, project coordinators, and even the building owner can walk the camera through the site. Senior architects can review the resulting 3D model from anywhere — inside the model, with measurements, annotations, and detail photos in front of them — instead of physically returning to the site.
Supported consumer 360° cameras
Any of these widely available cameras works:
- Insta360 X5 (best performance)
- Insta360 X4
- Insta360 ONE X2
- Insta360 ONE RS 1-Inch 360 Edition
- Ricoh Theta X
Hardware cost is typically $300–$1,200 — a single line item compared to a laser scanner instrument purchase ($18K–$28K) or a Matterport Pro3 camera plus subscription ($5K+).
An end-to-end bid workflow with CupixVista
- Walk the site with a supported 360° camera. Use OmniNote on a phone for detail photos and voice notes pinned to the 3D model.
- Upload through the VistaCapture app. AI processing typically completes in 2–3 hours.
- Open the project in a browser or VistaPoint. Measure distances, areas, and volumes. Run an elevation heatmap. Walk the 360° tour or fly the 3D dollhouse. Drop annotations on specific features the bid needs to address.
- Invite the rest of the team — estimators, MEP consultants, structural engineers, and senior architects — to the shared project. Each role can review the same record from anywhere. Firms report up to 83% travel-cost reduction and 24× faster site analysis compared to photo-and-note documentation.
- Export the point cloud to PLY, XYZ, or E57, or one-click import into Autodesk Revit through the CupixVista plugin to start the BIM model.
- Bid the project from a complete record. Reduce the gap between what the bid promises and what the construction crew finds on day one.
How CupixVista compares to other 3D documentation options
For architecture firms evaluating tools beyond traditional manual capture, two other categories often come up: survey-grade laser scanning (Leica BLK360, FARO Focus) and Matterport. Both excel at what they are aimed at — millimeter precision indoor scanning and polished indoor digital twins for real estate — but neither is built for the DIY, tight-budget pre-bid case described in this post.
For a head-to-head comparison, see the companion post: A Leica BLK360 or Matterport alternative for tight-budget DIY 3D scanning. For a broader review of how 360° video SLAM compares to iPhone LiDAR apps and photogrammetry, see Choosing a 3D scanning method for an as-built site survey.
FAQ
How fast can an architect run an existing conditions survey with CupixVista?
Roughly 20 minutes of capture for up to 60,000 sq ft, plus 2–3 hours of AI processing. The project is ready to review the same day. A single-family home that previously took two architects half a day to document by hand can be captured by one team member in under 20 minutes.
Can a junior team member run the site capture?
Yes. There is no specialist training required. The workflow is: walk the site with the camera, record OmniNote photos and voice notes on a phone, upload through the VistaCapture app. Senior architects can review the resulting model remotely, with measurements and annotations, without traveling to the site.
How accurate is CupixVista for renovation bid documentation?
CupixVista uses IMU data from the camera and GPS from the phone (for outdoor segments) to estimate real-world scale. Dimensions are typically within 1–2% of actual measurements — schematic accuracy suitable for renovation bid documentation, as-built records, design exploration, and most scan-to-BIM handoffs. For forensic, structural, or heritage work that requires millimeter tolerance, a survey-grade laser scanner is the right tool.
Can I import CupixVista data into Revit for a BIM model?
Yes. A one-click Autodesk Revit plugin imports the point cloud directly into Revit for scan-to-BIM workflows. Standard exports (PLY, XYZ, E57) also work for other modeling pipelines.
What’s the cost compared to hiring a laser scanning service?
A supported consumer 360° camera runs $300–$1,200 one-time. CupixVista software pricing is on the CupixVista pricing page. A typical laser scanning service costs $500–$1,000 per day plus operator time, and a survey-grade BLK360 instrument purchase is $18K–$28K. For a firm running existing conditions surveys on a per-project basis, the order-of-magnitude difference matters — especially during the pre-bid window when the bid budget hasn’t been won yet.
Try it on the next renovation or tenant improvement bid
The next time a renovation or tenant improvement bid is on the calendar, the lowest-friction way to test a new existing conditions workflow is to run a single capture and compare it to the documentation the team would have produced manually. The pre-bid walk takes 20 minutes either way — the difference is what’s in the firm’s hands afterward.
Get started with CupixVista for camera setup and a tutorial, browse the FAQs for common architect questions, or see pricing for team plans.